1st Time Use Instructions for the 2nd Generation Portables from Arizer:
- Solo2
- Air2
- ArGo
******************
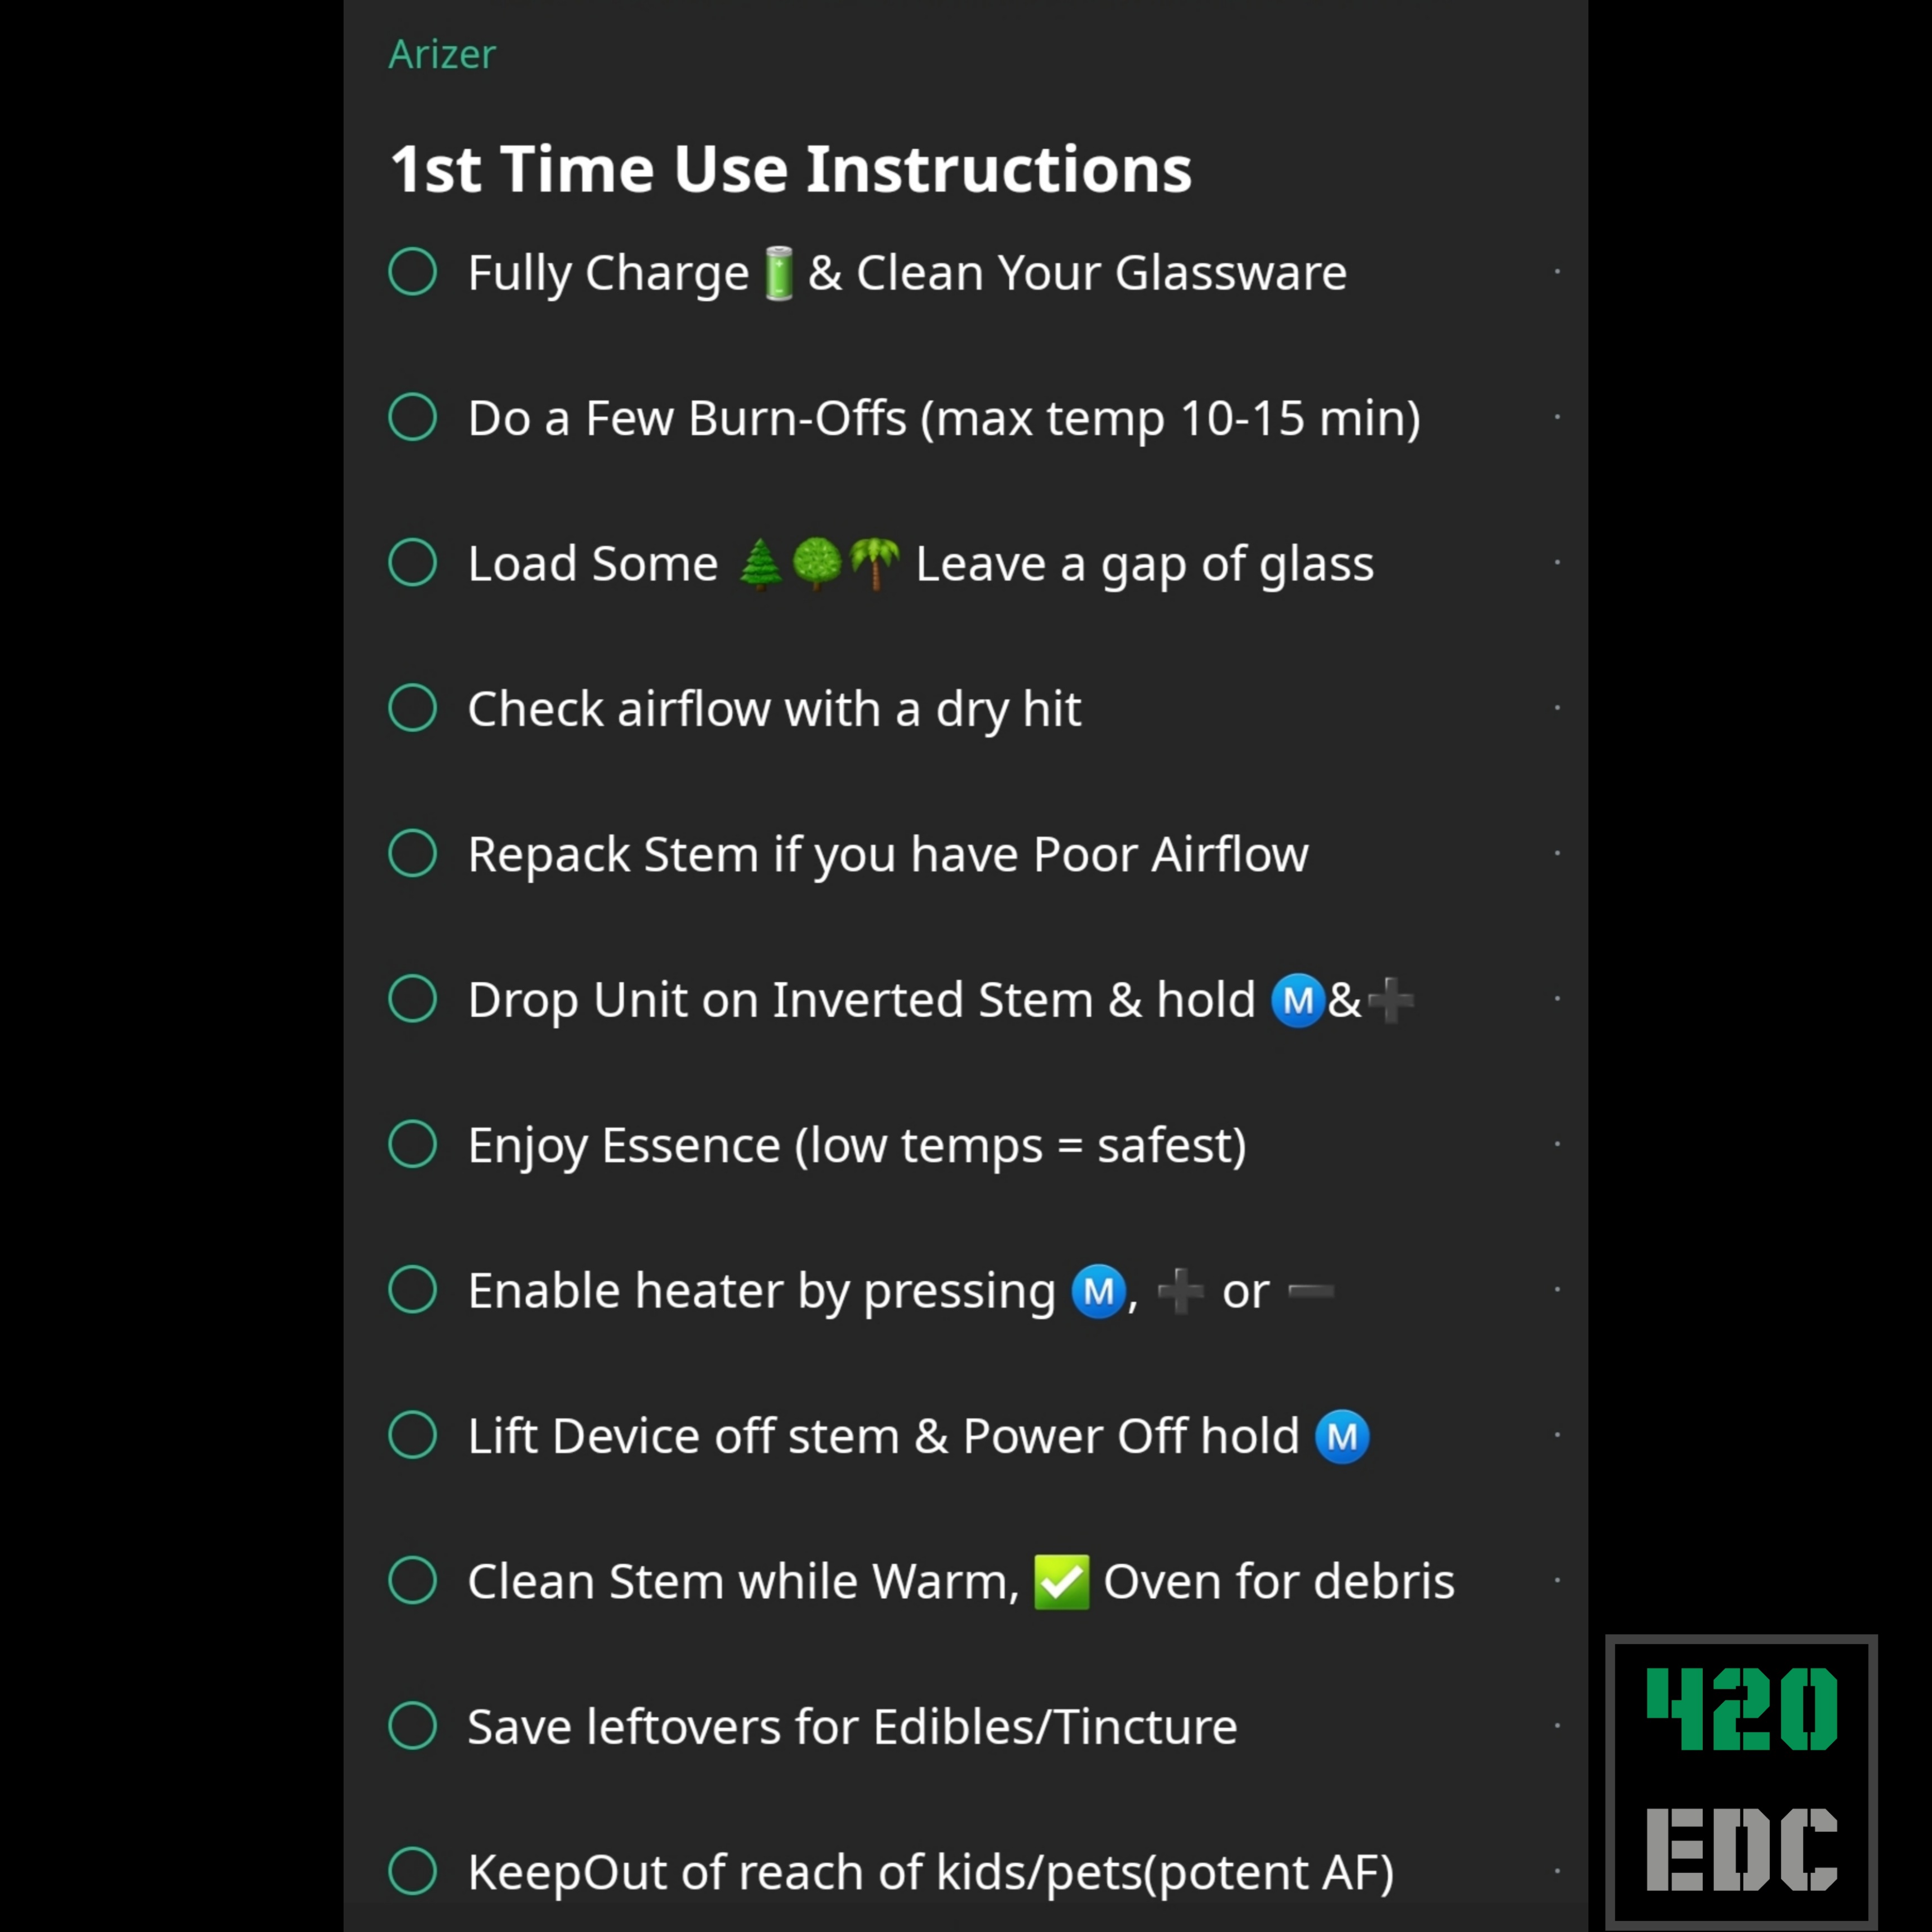
- Fully charge your battery (this is a good time to read the user manual and understand the manufacturer's instructions beyond this guidance).
- Clean your glassware
- Do a few burn off runs at MAX Temp (run device without glass inserted for 10-15 minutes)
- Load ground flowers into the chamber of glass stem. Don't pack tight and leave a 1-2mm gap of empty glass at the base of the chamber so that flowers are not coming into contact with oven floor. Use the fat part of your finger to gently tamp the material on the end so that it stays in place.
- Check AirFlow by taking a dry hit on the stem before inserting it into the device. You should be able to easily pull air through the flowers and glass. If it is difficult, empty the stem and repack it.
- Drop your device onto the loaded inverted stem, use gravity to your advantage both loading and unloading the stem. This prevents flowers from falling out into the oven and charring quickly causing a foul taste from the device.
- Hold Ⓜ️ & ➕ Button to power up the device(*). Enable the heater by pressing one of the buttons on the device after you power up.
- Enjoy the essence from your flowers. Remember that lower temps are safest, consider extracting at lower temps for a longer duration for the healthiest aroma and a more thorough extraction.
- Power Off by Pressing Ⓜ️ Glass chamber will be hot. Lift the Device off the Inverted Stem (Gravity is your friend).
- Clean Stem while warm for least maintenance long term. Allowing flowers to cool inside the stem makes it harder to get them out post session and this creates more debris that will accumulate in and around the chamber requiring more maintence.
- Check the Oven for any debris that may have fallen out once you remove the glass. Dump out any bits you might find, dislodge with a cleaning tool (gently) if you see anything stuck that won't dump out. This will keep your chamber cleaner long term and keep flavors optimal.
- Save your leftovers for tincture or edibles. Keep out of reach of children and pets as these flowers are activated and potent.
Beyond the instructions above and below for Gen 3:
- ⚠️Wear Safety Glasses and Gloves when using Isopropyl Alcohol or Culinary Solvent and allow glass to fully dry before use
- * Power Up on the Arizer Air2 is Ⓜ️ & ➖
- To Power Down you only need to hold Ⓜ️ on any unit
- DRAW S L O W L Y
- Cleaner Glass tastes better, it is easier to clean the cleaner it is.
The following Instructions Cover 3rd Generation Portables from Arizer: Air MAX, Air SE and Solo II MAX
⚠️ Error 2 Prevention: Remember on the Arizer AirMAX that you must remove the plastic battery protector from the inside of the negative terminal of the battery. This is located at the base of the unit where the battery door screws on/off the device. Remove the door and the plastic battery protector, then replace the door and follow the steps below.
The Arizer Air SE only has a single button to operate.
- Hold the button 2-3 seconds to power the device on
- Device will flash a battery status initially upon boot (Green ≈ 100%, White ≈ 70%, Yellow ≈ 40%, Red ≈ 10%)
- Select a temperature to engage the heater by pressing up for hotter or down for colder on the button (Blue 356˚F, White 374˚F, Green 392˚F, Yellow 401˚F, Red 410˚F). Power light will flash until the device reaches desired temperature then become solid.
- Hold the button 2-3 second to power off the device
Solo II MAX functions like the OG Solo II from Arizer, it just has more menu options and dark mode which we are not delving into on this blog post.